Overview
As mentioned in my previous posts, PROXMOX VE (PVE) can be run as a cluster. The cluster configuration is based on one node being the master and other nodes being the slaves .
By implementing a cluster, you will be able to balance the workload on several hosts and you will be able to increase the availability of your virtual machines. With a PROXMOX VE Cluster, you will be able to perform “live migration” even if you do not have shared storage. In case of hardware maintenance, you will be able to move “on the fly” the virtual machines on another node with no downtime (or limited downtime).
Now what’s happens if a cluster node fails ? If you haven’t implemented any shared storage, you might have no more access to some of your virtual machines. The PROXMOX VE does not migrate your VM from one node to another if a crash occurs. I haven’t tested yet the situation if a shared storage infrastructure or using the DRDB technology.At the moment, we will not dive so deeply in the product and the clustering features. We will come back to these topics in some future posts.
In order to build the PVE Cluster, we need to install 2 PROXMOX VE servers. Follow the Installation procedure described on Part I,
In our example, the PROXMOX VE hosts will have the following settings :
HOST 1
- Hostname : NODE1.Study.lab
- IP Address : 192.168.1.10
- Subnet Mask : 255.255.255.0
HOST 2
- Hostname : NODE2.Study.lab
- IP Address : 192.168.1.11
- Subnet Mask : 255.255.255.0
SETTING UP A 2-NODE PROXMOX VE CLUSTER
You will see that building a cluster with PROXMOX VE is really simple. However, you have to know that the setup cannot be performed through the web interface (at the moment). You will need to use the command line. You will need to logon locally on the console of each PROXMOX VE hosts and perform the following tasks or you can use your favorite ssh client tool (I’m using Putty.exe) in order to remotely connect to your PROXMOX VE hosts and perform the configuration steps.
Let’s start !
Important Note :
Before trying to create the cluster, you will need to ensure that both PROXMOX VE Hosts are in sync. You have to check that both hosts have the same time. If there is a time difference between the two hosts, you will get error messages within your console. If the time is not identical between the hosts, you might end up with the following error when creating your cluster.
Ticket authentication failed – invalid ticket ‘root::root::1252946231::f1292eb0564a15169aaf30e36 1382247fccf718c’
Step 1 : Check time settings on both nodes
In part 2, we have shown you how to check the configuration of your system. Let to this again.
- Open your favorite browser and login into the Web interface on node 1 and node 2
- On the left menu, in the Configuration section, click on system
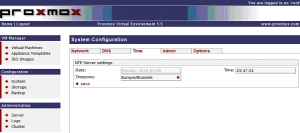
- click on the Time tab
- Check that the Time is identical on both hosts
If they are not, you can use the following command line (through putty or console) to set the correct time on the hosts
date +%T -s “hh:mm:ss” (ex. : date +%T -s”10:15:53″)
Note: We recommend to use a NTP server in order to synchronize your clock automatically. you can set the ntp server by editing the /etc/ntp.conf file.
Step 2 : Go to your master Node and create your cluster
In this demo, I’m assuming that the Node1 will be the master node of the future cluster I’m building up
- Logon into the console or use putty to node1
- Type the following command pveca –help. pveca is the command line utility that will be used to create the cluster. As you can see, there not a lot of options ->meaning quite simple to use 🙂

- To create the cluster, you will need to type the following command in the console, pveca -c
- If everything went correctly, you will see the following output
Step 3 : Go to your slave Node and add it to your cluster
- Login into your slave server (in this demo node2) through the console or using putty.exe
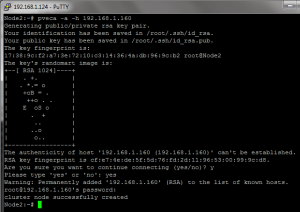
- To add the server to the cluster, you simply type the following command pveca -a -h <%IP address of the Master Server %>
- You will be asked if you want to continue the connection. Type yes. You will then need to provide the password for the master node. At the end of the procedure, you will have a PVE Cluster
- As a final step, you can type pveca -l to check the status of your PVE Cluster
That’s it ! Yes, you have typed in 3 commands and you have a working PVE cluster. That’s cool !
So, let see what’s has changed in the web interface !
Managing your PVE Cluster through the Web Interface
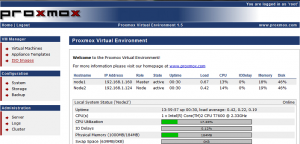
In order to manager your cluster, you should always connect to the master node. Even you are able to manage both nodes, some operations can be performed only from the Master Node. For example, I’ve tried to download an appliance to the slave node and had a message error stating that I had no Write access. If you login into your console, you can notice on the home page on the top section that you have the information about the cluster and status of the nodes.
Note : It’s possible that just after creating the cluster, you will get a blinking message specifying that nodes are not in sync. You will just need to wait a little bit in order to have the nodes to synchronize between each others.
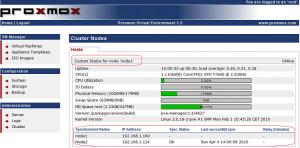
You can click on one of the node in the table and you will be redirected to the management console of the node you have selected (see figure below)
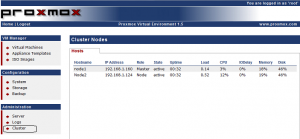
In the administration section (on the left menu), you can click on the cluster link and have access to read only information about your cluster. you can see the nodes that are member of the cluster. You can also quickly check the status and identify the master node from the other nodes.
How to migrate Virtual Machines from one node to another ?
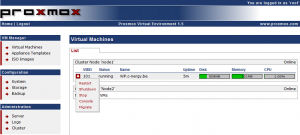
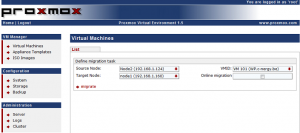
To finish with this post, i want to outline the process to migrate virtual machines from one host to another one. For this post, i have download and created an OpenVZ container on my Proxmox VE cluster. In the VM Manager section (on the left menu), simply click on the virtual machines link. In the right pane, you will see the list of the virtual machines (in my demo, i have only one). If you click on the red arrow at the corner, you have a contextual menu where you can select the option “Migrate”
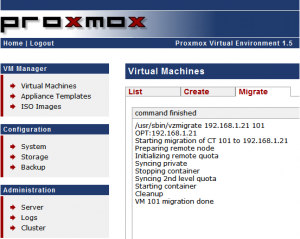
You will be then presented this interface. You have to specify the source node, the target node and the virtual machine to migrate. You have two options : you can perform an offline migration or an online migration. In this demo (and because there is a known bug with openVz container), we will perform an offline migration. When you have provided the appropriate information, you can click on the migrate link .
If you migration is successful, you will have an output similar to this one.
Known Issue
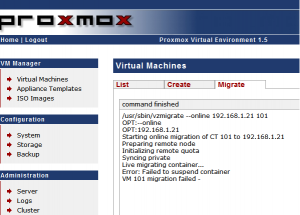
If your are performing an online migration for KVM virtual machines, you should normally have no issues and the live migration will work as expected. If you are trying to perform an online migration of an OpenVZ container, the migration will fail and you will get a message error similar to “Failed to suspend container”.
This is a known issue with OpenVZ. At the moment, you cannot perform an online migration for OpenVZ. However, you can still perform an Offline migration. You will get some downtime but I have to say that the move/migration was quite fast.
To have more info about the OpenVZ bug, see the following links
http://bugzilla.openvz.org/show_bug.cgi?id=850
http://bugzilla.openvz.org/show_bug.cgi?id=881
Conclusion
That’s for this post. To summarize, so far, we have demonstrate how to perform the installation of the PROXMOX HOST Servers. We have presented the interface that’s used to manage your newly installed Virtualization infrastructure. Finally, we have explained how to create a 2-Node Cluster. At this point, you should have a good comprehension of the PROXMOX VE solution. Now, it’s time for us to explain how to create virtual machines. This will be explained in Part 4.
Till Then
Stay Tuned





Can you please help me, I have installed the Proxmox VE on my PC and I can’t get to use it and am unable to go back to my normal windows because I don’t know the commands to do so.Please assist. I need a way to remove it from my PC.
Euh !! Your message is not really clear. check Part 1 and 2. If you have installed PROXMOX VE, you have formatted your hard disk. Proxmox VE (by default) comes with a command line interface (on the host where proxmox ve is installed). To connect to your server, you need to use a browser. If you want to uninstall Proxmox ve, you have to reinstall a new operating system on your machine and format again your hard disk
This is great. Thanks. How do we setup a master-master cluster? I heard the new Proxmox can actually do that, right?
Hello Ron,
You are correct : the new version of the Proxmox VE should allow us to create a master master cluster. The Proxmox VE 2.0 is not yet available. So I was not able to test and prepare a walkthrough guide yet. I can’t wait to play with the beta version that should be available quite soon. This multi-cluster model will be probably based on the new corosync technology (real time replication mechanism).. We shall see what the proxmox ve team will come up ….
Thank for passing by. See ya
Hello,
It is possible to add a slave note to a master if the slave has already VM running on it?
I saw a video guide at http://pve.proxmox.com/wiki/Cluster_configuration_(Video) in which at the minute 1.05 the speaker says: “You have to make sure there s no wirtual machine on the node”.
There are some problems also if there are running VM on the Master node?
I read that it is not possible to do a live migration of a OpenVZ machine, but in the guide you used the version 1.5 of proxmox. Do you know if this problem has been solved in the current version 1.9?
Thanks
Ciao Francesco,
To answer to your first question, I think that technically you could perform that but the recommendation would be to not have VM running. Proxmox Team recommends this because you might end up with VM having exaclty the same VMID. I always turn off VMs or add empty slave to my cluster….
Regarding the second question about openvz and live migration, the PVE 1.9 is out since yesterday., I havn’t test specifically this version (I’m abroad again….) but the previous version 1.8 should work. You need to check that you are using the correct PVE kernel version and you should be able to perform online migration of OpenVz.
Thank for your visit….
What happens after the “offline Migration” step described above?
So you get a (huge) file to download and upload again on the other node?
Then there should be some step (web-ui, terminal?) on the target to load the file and start it up, right?
What I am looking for is simply a way to export a VM on one physical machine and import it into another (which is based on the same OpenVZ kernel). VMware can do this – Promox also?
Hello there,
Not sure I fully understand the question but I’ll try to answer to it
When you have a PVE cluster, you do not need to download/upload huge files because the software does that for you automatically.
In this article, I had to perform an “Offline” Migration (meaning the OpenVZ was turned off) because of a bug. PVE Cluster will move your virtual machine to the other node and reattach the file accordingly. You will simply need to restart the virtual machine.
Note : KVM Virtual machine onlinemigration needs a Shared Storage. here the principle is different, you do not move vm files, you simply change the configuration settings in order to have one of the PVE node pointing to the correct vm files
If you want to have import/Export functionalities, you can simply perform a backup using the WebGUi of the OpenVz virtual machine and restore it to another PVE server (not in a cluster). You could probably also simply copy files from one proxmox ve to another one using winscp,putty or any tool you like.
By the way, the bug should be fixed and you can perform online migraion for KVM and OpenVz containers
Cheers
Import/Export is my request – making the backup works fine (automatically), but how does one “restore it to another PVE server”?
Can it be handled like a template, i.e. upload with “Appliance Templates>Local>Upload File”?
Hello There,
Sorry for the delay..was really busy.. To answer your question, the import/export does not exists (yet?) in PVE. With VMWARE, you can indeed import/export ovf files into your esx server. With Proxmox VE, this is still a manual process.
To explain the process, I’m assuming that you have 2 PVE hosts that are not configured in Cluster. In PVE host 1, you have a OpenVZ virtual machine that you want to “copy/move/migrate” to the PVE Host 2 -> to perform this action, you take a backup of the virtual machine (using the cmdline, it’s look like vzdump –compress –dumpdir /home/backup <%VMID%> where vmid is the id of the virtual machine)
You will then need to copy the file in the PVE Host 2 (any location). Then from there, you simply restore the Openvz virtual machine by using the command line similar to
vzrestore vzdump-openvz-backup.tar VMID – > where vmid can be any number not yet in used by any other virtual machines
If you plan to use KVM, you have to copy the files related to your kvm virtual machine from one host to another host (I’m assuming your are using local storage)
look in the following directories
the image is stored in /var/lib/vz/images/
the configuration file is located in /etc/qemu-server/
Hope this answer your question
Note : if you working only with openVz, you can also “migrate” Vm with the vzmigrate command (check this link :http://wiki.openvz.org/Migration_from_one_HN_to_another
Thanks for clearing this up.
The process for migration with vzmigrate seems to be more complicated, the only advantage I see would be less downtime (using the –online option).
But as the VM on the new hardware will need some extra testing anyway (be it only for IP-dependant functions) the longer downtime with backup-restore does not make a real difference IMHO.
BTW, now I also found a hint on backup-restore in the Proxmox wiki:
http://pve.proxmox.com/wiki/Backup_-_Restore_-_Live_Migration
Hello,
I’ve found a link to your web site on
http://www.yahyanursalim.com/linux/cloud-computing-with-proxmox-ve.html
Thank you for spending some time on this